
I am having a very lovely and very productive weekend. The weather has been brilliant, which is great for all my friends who are at an event this weekend and we have been having a major sort of of all of Jake’s things.
He leaves for Japan in 3 weeks 🙂 so he has been getting rid of things he no longer needs as hopefully, he will love it and be able to stay for a while.We were very inspired by Ellen’s work on the kitchen last week so lots of things have been re-homed.
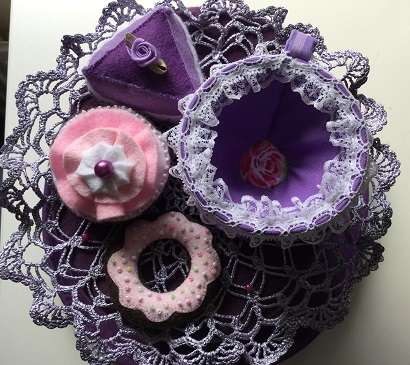
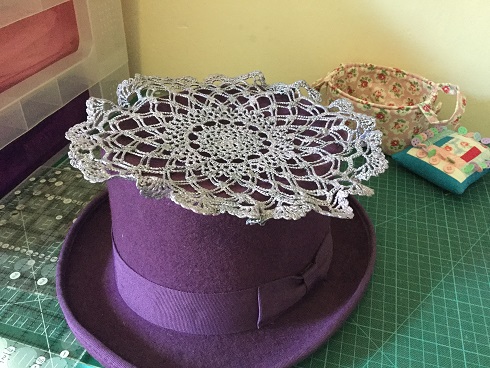
I have finished the tea party hat and am so pleased with it! It is exactly what I wanted and it looks so cute 🙂

I did a quick bit of embroidery this week on some of the vintage linen I used to make the tablecloth jacket and taped that to some card to make a little sign.


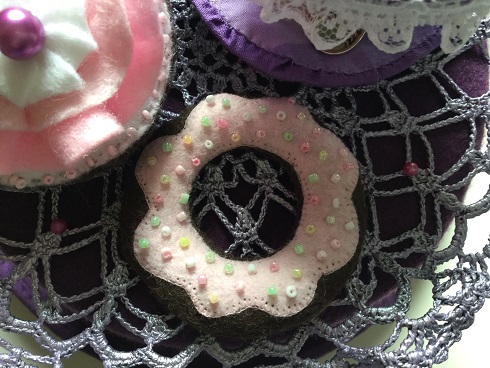
The donut is probably a little small in scale but I love the way it looks and any bigger would have obscured the teacup.
I love this little purple cake! I have a whole packet of these little ribbon roses that I bought from Spain and am planning to use some for Barbie dresses.

I found the little spoons from this supplier on Etsy and they are the perfect size.
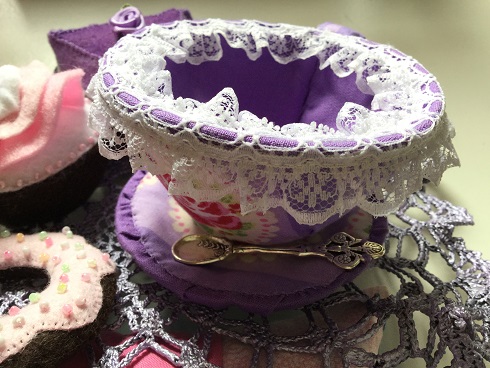
Ironically it probably took as long to make as a new jacket would have but it was very peaceful sewing of an evening and I am so please with how all of the felt cakes turned out.It is attached to the hat by a combination of double sided foam tape and pins and seems secure. All I need now is a miniature bottle of gin (aka TEA) to go on the front.
I could not find any actual tutorials of how to make a teacup so thought it might be useful to do one here, partly to remind myself as I have plans for another teacup hat for later in the season. The doily is the one I had previously stiffened with Powertex and painted. It is more purple than it looks in this picture.
I started with an Evian bottle and cut both top and bottom with a craft knife. I chose this bottle specifically as it had a nice rounded shape for both cup and saucer.I taped up the bottle to give it a little more stability. I cut the teacup part open for ease of sewing.


The patterns I made from the plastic pieces, adding extra for seaming. I cut a layer of thin wadding from these. I then put double sided tape all over the plastic so that I could stick wadding to it.


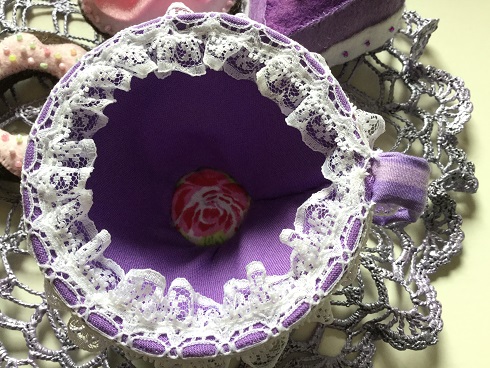
I fussy cut the floral fabric as I wanted to have one of the roses showing on the cup.


I sewed the inner fabric first to the wadding with the tea cup still open, then sewed on the outer and stitched it together. I cut a small rose motif out and used it for the cup base.


The saucer was done the same way with wadding stuck on first. I could not easily attach the cup to the base due to the curve of the saucer so Ellen came to the rescue with her glue gun. I am definitely going to get one of those as they are so useful for Steampunk creations.
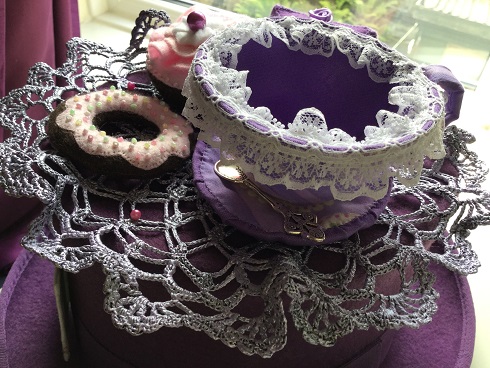
The handle was just a piece of fabric with wadding and a short piece of garden wire to give it shape. It was quite easy to just sew that to the side of the cup. A little bit of lace from stash gives it a final elegant touch and voila, one fabric teacup!
This is what I love about Steampunk, the creativity and the problem solving, I have seen lots of wonderful teacup hats and am so glad I now know how to make one.
I am continuing with felt flowers this afternoon but with a little twist as I am combining them with Liberty fabric. My intention is to make some pouches with them as decoration which I think may sell well at Yarndale.
I have not had much chance to make stock for that yet so will have to get cracking. I have another two weeks before the doctorate is finished and then there will be lots more time for crafting, hurrah!
I hope you are all having a lovely weekend whatever you are doing. Take care and thanks for visiting.

That is a real delight of a hat, and I love the fabric teacup and saucer – perfect!
Thank you so much, I am looking forward to making another one!