Just thought I would do an update on my work yesterday and share with you a tutorial for my latest Xmas ornament. I had a very lovely day – unfortunately today is wet as well so I will just have to carry on sitting making more ornaments, how sad 😉
I would love to design and make full-time but in the mean time am happy with the little bits I get to do.
This is my third original Xmas ornament design, tutorials for the crazy patchwork Xmas tree and information on the Crazy patchwork Xmas heart can be found at these links. None of these are earthshatteringly different from other things you can find on the web but are all my own work.
I have never done anything with hexagons before and have quite frankly considered English Paper Piecing a bit of a faff but I am very much enjoying this.
My inspiration came from two free gifts from my Love Quilting and Patchwork magazines. I started sewing the hexi pincushion last week on the train and I really liked it.

I do enjoy small-scale work and as friends have always told me these are very portable projects. The free pre-cut papers will come in very handy as well!
Here are the two I finished yesterday and below is a step by step guide for those of you who might like to have a go yourselves.

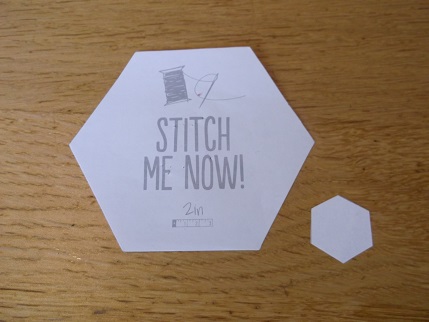
The ornament is made from 2 sizes of hexagon – 2 inch for the main body of the ornament and 1 cm for each of the hexagons in the ‘flower’. Please note that hexagons are sized by the length of each side (something that I found a bit confusing to start with) and you can happily mix metric and imperial measurements.
If you want to save yourself the trouble of drawing round a template here are links for free printables from the Snippets and Blabbery blog and some free printable hexagon graph paper in different sizes and you can also buy pre-cut papers from many sources including these from Quilt Direct.
There are also lots of pre-cut (and even pre-stitched onto papers) fabric on Ebay if you really want to save time, for me half of the fun is choosing the fabric though.
I used material from my small (ahem) stock of Xmas fabric but this design would work well from charm packs and scraps from other quilting.
Step 1 – Cut out 2 of the larger 2 inch hexagons from your backing fabric, I have used plain for the front and patterned for the back.
Step 2 – Cut out 7 of the smaller 1 cm hexagons – I used 3 different fabrics from the same ranges for each of my designs. You need a bigger seam allowance than you might think for folding over, I use 0.5 cm.
The small size of the hexagons makes it great for fussy cutting elements out of larger designs but you may have to watch the orientation of the hexagons when you stitch them together if the design had a ‘right way up’.
Fussy cutting means choosing a part of the design rather than just cutting out of the general fabric, it does mean you get more waste but the effect is good.
Step 3 – Sew the smaller hexagons onto your paper hexagons folding the seams over as you go. Use a contrasting thread then it is easier to unpick when you take the papers out. There is an excellent step by step tutorial on making a hexagon flower at Pretty by Hand’s blog here which shows how to stitch the pieces together.

Step 4 – Arrange the 7 hexagons into a flower shape and sew all the seams together using small stitches. If you are using a plain centre fabric the same as the backing then you could just have a ring of 6 hexagons but I liked the stability of the flower shape. Iron at this point to help secure seams for the next stage.

Step 5 – Remove the stitches and then the hexagon backing paper pieces carefully. I use my unpicker for this bit, you can re-use the papers if you are careful. I did then tack the outer 3 edges of each hexagon (those that are not sewn to anything), this makes the next step easier.
Step 6 – Applique your hexagon flower to one of the large backing hexagons using small stitches in a matching thread colour – if you have multiple colours in your flower go for a match to your backing fabric.

Step 7 – Put the appliqued front hexagon and your backing hexagon right sides together and stitch all the way round – I used hand stitching with a running stitch then went back to fill in the gaps but you could machine stitch.
Step 8 – Turn ornament to show right sides – poking the corners with scissor ends or a pencil help to ensure sharp corners.
Step 9 – Stuff the ornament – I use polyester toy filling for all my work available from craft shops or places like this on Ebay.
Step 10 – Turn the raw edges of the open side over, pin and sew. I have made this the top edge on my ornaments as however careful you are it never looks the same as all the other edges and the ribbon hides some of this.
Step 11 – Sew through the middle of the centre hexagon with some tiny stitches pulling tight to create a hollow in the centre – stitch a small button, bead or embellishment there.

Step 12 – Attach a ribbon to the back of the ornament, I have also added a bead to cover up the stitching.

If you want more hexagon inspiration go and have a look at this Pinterest page that I found the other evening – I particularly love the designs from the Broderie blog featured on that page though it would take centuries for me to complete anything like her quilts.
And look at this for hexi love – this was from the same Pinterest page, not sure who it was from originally but look at that stash!

I am aiming to make 10 of these ornaments for this year’s friends and family seasonal gifts so am going to be having an enjoyable and productive Autumn.
Happy ornament making and thanks for visiting.

You remind me I was once going to make a coat of EPP in chinese satin offcuts.
I wonder where it has got to…!
That sounds very lovely – I think I will only be making very small projects from this technique but love looking at everyone else’s hexi quilts on Pinterest and blogs. Maybe I should start a bigger quilt now as a retirement present to myself!